Search This Blog

Saturday, May 15, 2010

Backsplash

I knew that I wanted white subway tile for the backsplash. In fact, I wanted it over the entire back wall behind the sink. At 21 cents a piece, it's a reasonable option. We used American Tile 3x6 porcelain subway tile in Snow White.

I had gone to my local Habitat for Humanity Restore and purchased adhesive and grout for about 25% of the original price. This project was by far, the most economical one we have done.

Neither one of us had tiled previously, but DH got the hang of it quickly.


This is actually them installing my awesome Domsjo IKEA apron sink.

The wet saw and straight cut tile saw borrowed from our friend made all the difference in the world. Once we got going, it went very quickly and smoothly.


We had to run the first course of 2-3 rows and let them sit for 24 hours. Then we were able to build upon that foundation of tile, so to speak. With the team work of me cutting and him laying, it made for an evening's worth of work. I grouted the next day and voila!


By the way, doesn't that sink rock?!!

Peace,
Maria

Monday, May 10, 2010

Granite Countertop

I had a dilemma. Because of the funky layout in the kitchen, custom countertops were way out of our budget. I needed to figure out a way to maintain the layout and work with the one inch thick plywood that was currently on my countertop. I didn't want to buy a new piece of laminate with inferior pressed wood under it. I lifted the existing tiles off - some of them with my bare hands they were so loose.


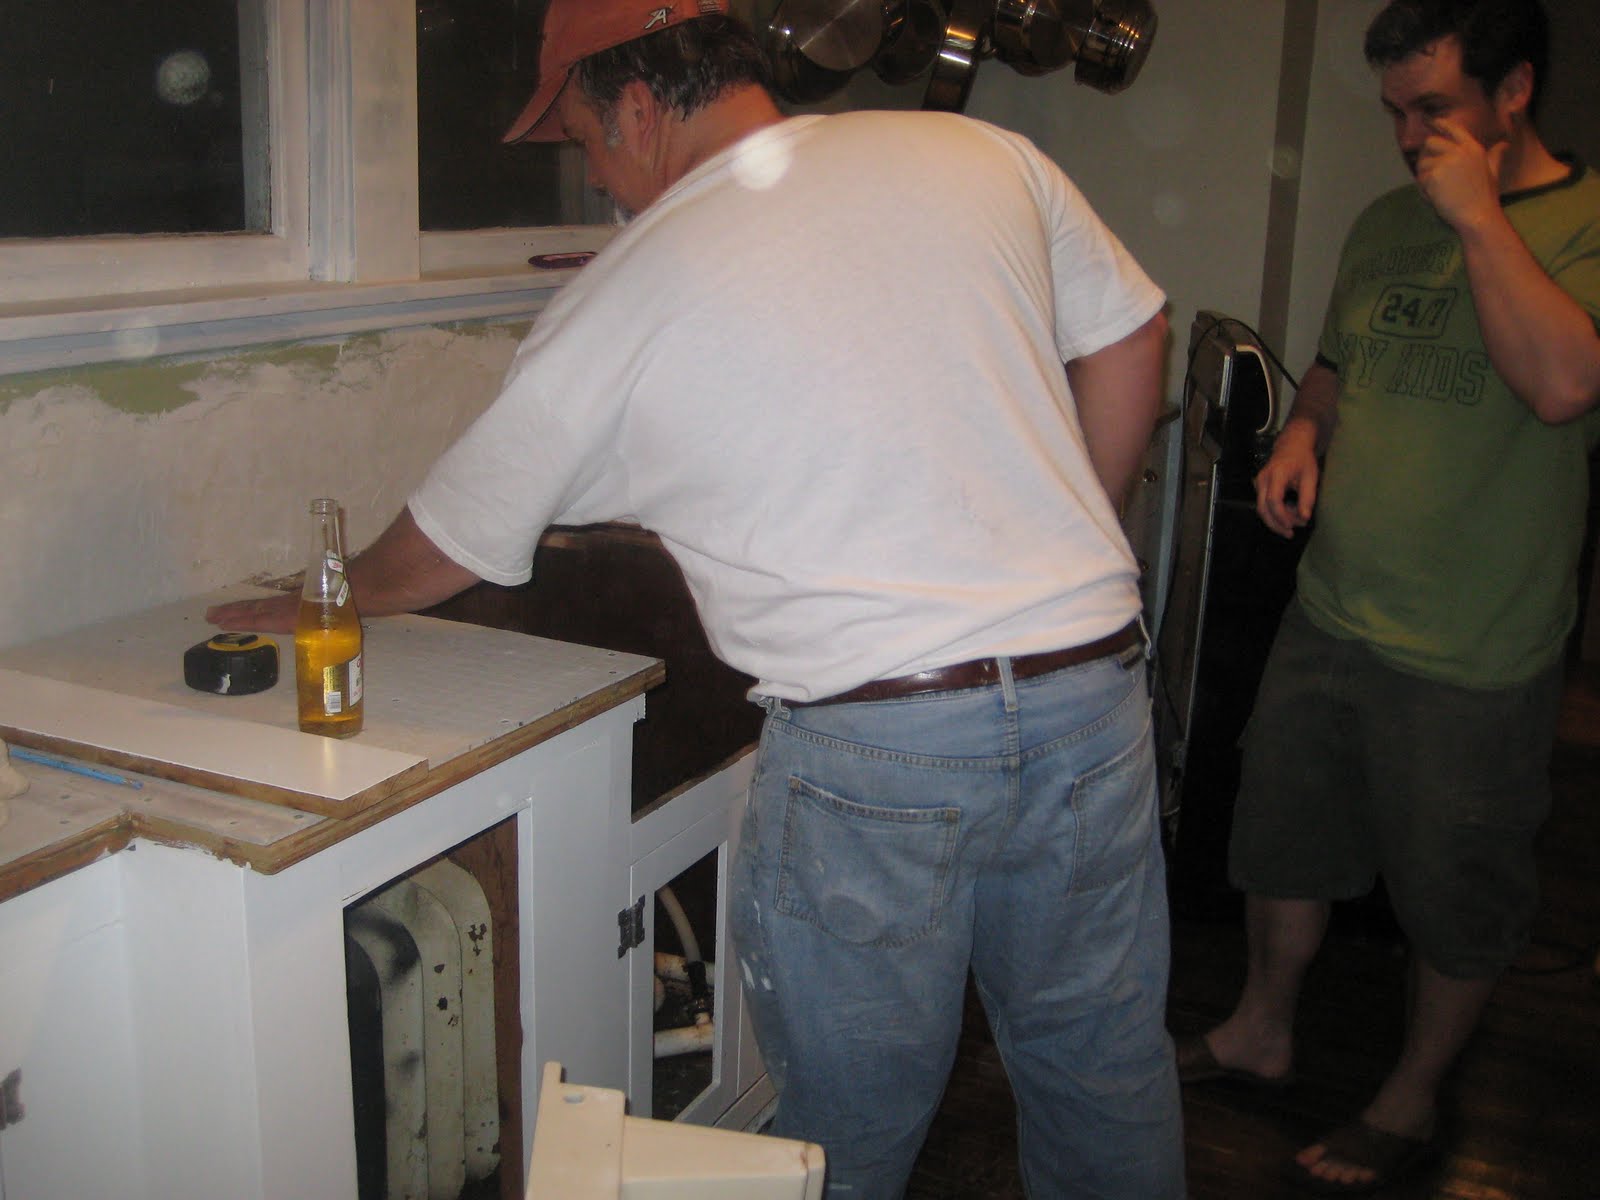
Then we laid the hardy back cement board down over the plywood. It is a great product with graphed out lines for easy cutting. Just score it with a special tool and snap like drywall.
Every 6 inches there is a marked circle where to put the screws in. Use the ones that are especially made for this product. The last thing you need is a screw lifting out and cracking your tile or grout.


Next we laid out the absolute black 12x12 granite tiles.


Our friend, Mark, (pictured left) had a wet saw that we could use to make all of our cuts with.

The biggest snafu was the edging.

At first we thought to use a new product by this company:
http://www.schluter.com/139.aspx

Really great product, perfect for our needs. But, we didn't have the time to wait for the corner pieces to be ordered and we were not sure that we could make the cuts well enough on our own.
So we decided to use a black granite chair rail piece:

http://www.homedepot.com/h_d1/N-5yc1vZ1xiy/R-100664289/h_d2/ProductDisplay?langId=-1&storeId=10051&catalogId=10053

Also a great product, but trying to make mitre cuts was IMPOSSIBLE!!!
After a few attempts and about $20 in wasted material, we were at a loss.

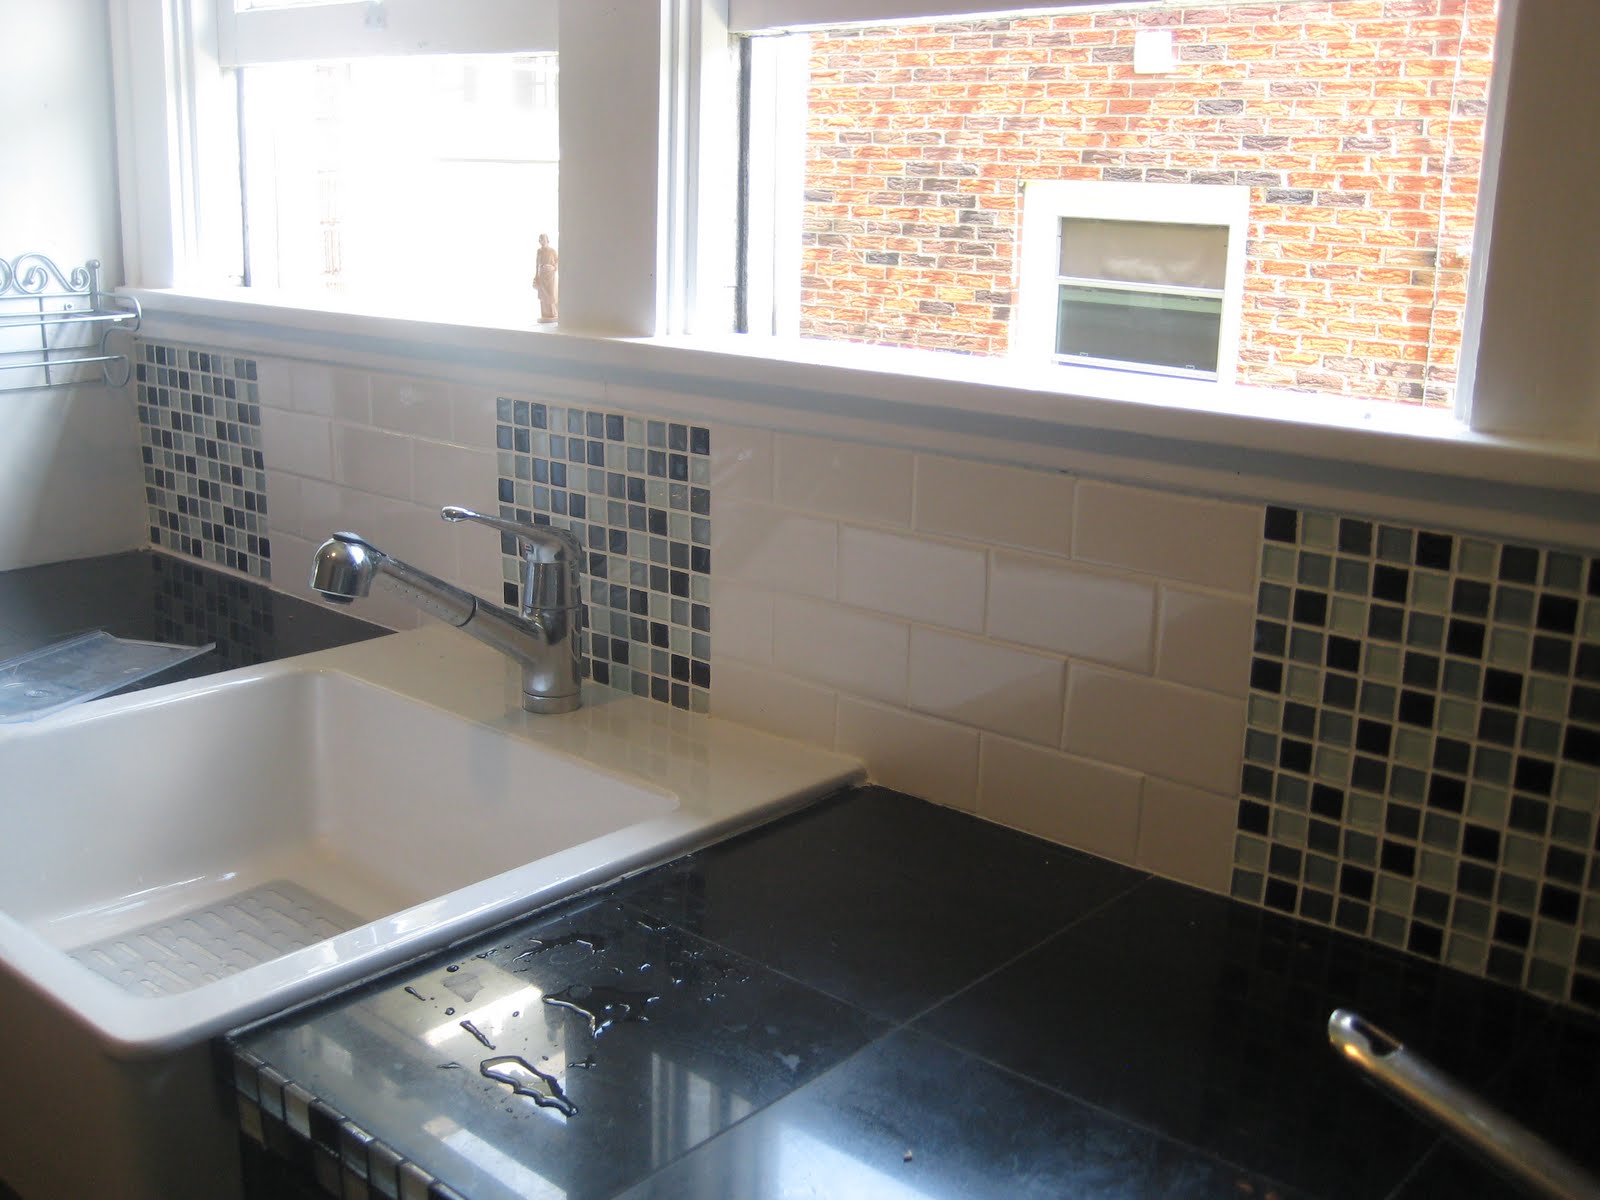
Then my DH had a stroke of brillance. We had put up a bit of the glass tile on the back splash and there was a couple of rows cut off from the mesh backing. He put it up to the edge and came up with this idea:


Awesome. And very custom I might add. I loved it. So, after a lot of adhesive, cutting and grout, we had this:


Back splash and wall of tile to follow!

Peace,
Maria

Remodeling II

Ok, so I am going to attempt to get this all down. There has been so much going on around here that I'm not sure I can remember it all during this whirlwind of activity.

The cabinets have all been painted white. My friend Peter helped me accomplish this monumental task. In some instances, we needed 3 coats of primer and then 3 more coats of paint. We did use the newest product from Behr - Ultra Premium, Primer and Paint in one. I used a primer sealer first and then used that paint over it. I would not reccommend using it on bare wood without some sort of sealer primer first. It's a great product, but it doesn't give it enough 'tooth' on its own.

This is a before pic (excuse the mess - it makes it more authentically 'before')


I took off the original hardware and sprayed it. I know that many might think that is not authentic, but all the other cabinetry got new hardware and I was trying to make it all cohesive. It helped bring out the detail in the fabulous latches. I will add the entire countertop project step by step soon!

Peace,
Maria